一个粘性动画的源码分析
周四(2016-03-24)下午在公司做了一次技术分享,现整理成博客的形式。
分享的内容是一款动画,动画源码下载地址、效果及 Keynote 下载地址如下:
源码下载地址:
https://github.com/KittenYang/GooeyTabbar
Keynote 下载地址:
http://pan.baidu.com/s/1qYUUKaw
源码效果:
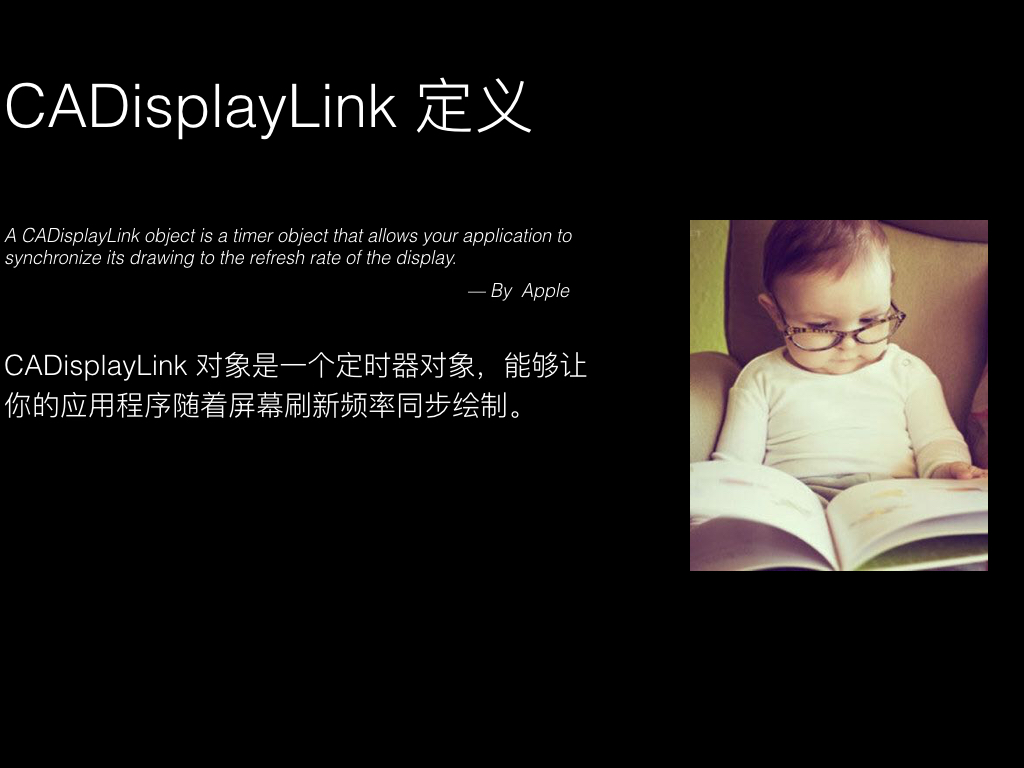
什么是 CADisplayLink ?
名词解释
A
CADisplayLinkobject is a timer object that allows your application to synchronize its drawing to the refresh rate of the display.——By Apple
CADisplayLink对象是一个定时器对象,能够让你的应用程序随着屏幕刷新频率同步绘制。
如何使用 CADisplayLink ?
|
|
用代码的方式解释一下:
CADisplayLink对象指定了一个选择器handleDisplayLink:。将
CADisplayLink对象添加至NSRunLoop.currentRunLoop()。屏幕刷新完毕后,会执行上面指定的选择器
handleDisplayLink:(iOS 设备的屏幕刷新频率( FPS )是 60Hz,因此CADisplayLink的selector默认调用周期是每秒 60 次)。
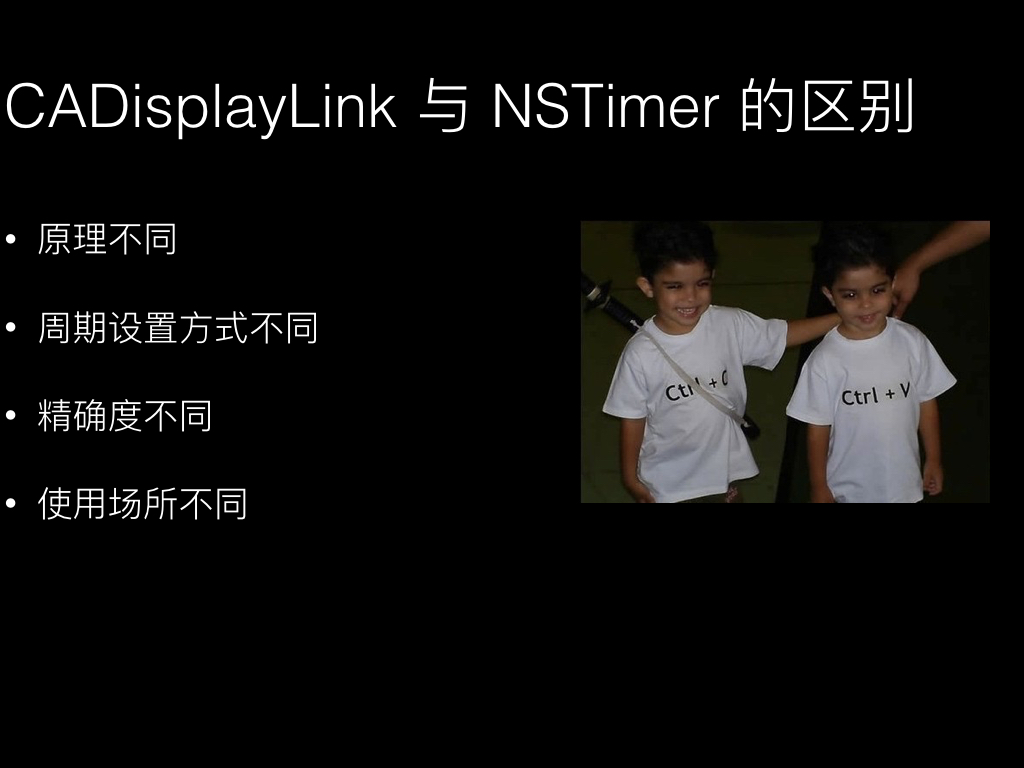
CADisplayLink VS NSTimer
看完上面的介绍,肯定会问 CADisplayLink 和 NSTimer 有什么区别?
1、原理不同
CADisplayLink是一个能让我们以和屏幕刷新率同步的频率将特定的内容画到屏幕上的定时器类。CADisplayLink以特定模式注册到 Runloop 后,每当屏幕显示内容刷新结束的时候,Runloop 就会向CADisplayLink指定的 target 发送一次指定的 selector 消息,CADisplayLink类对应的 selector 就会被调用一次。NSTimer以指定的模式注册到 Runloop 后,每当设定的周期时间到达后,Runloop会向指定的 target 发送一次指定的 selector 消息。
2、周期设置方式不同
iOS设备的屏幕刷新频率(FPS)是60Hz,因此
CADisplayLink的 selector 默认调用周期是每秒 60 次,这个周期可以通过frameInterval属性设置,CADisplayLink的 selector 每秒调用次数=60/frameInterval。比如当frameInterval设为 2,每秒调用就变成 30 次。因此,CADisplayLink周期的设置方式略显不便。
NSTimer的 selector 调用周期可以在初始化时直接设定,相对就灵活的多。
3、精确度不同
iOS 设备的屏幕刷新频率是固定的,
CADisplayLink在正常情况下会在每次刷新结束都被调用,精确度相当高。NSTimer的精确度就显得低了点,比如NSTimer的触发时间到的时候,Runloop 如果在忙于别的调用,触发时间就会推迟到下一个 Runloop 周期。更有甚者,在 OS X 10.9 以后为了尽量避免在NSTimer触发时间到了而去中断当前处理的任务,NSTimer新增了tolerance属性,让用户可以设置可以容忍的触发的时间范围。
4、使用场合
从原理上不难看出,
CADisplayLink使用场合相对专一,适合做界面的不停重绘,比如视频播放的时候需要不停地获取下一帧用于界面渲染。NSTimer的使用范围要广泛的多,各种需要单次或者循环定时处理的任务都可以使用。
请参考:
http://blog.csdn.net/wzzvictory/article/details/22417181
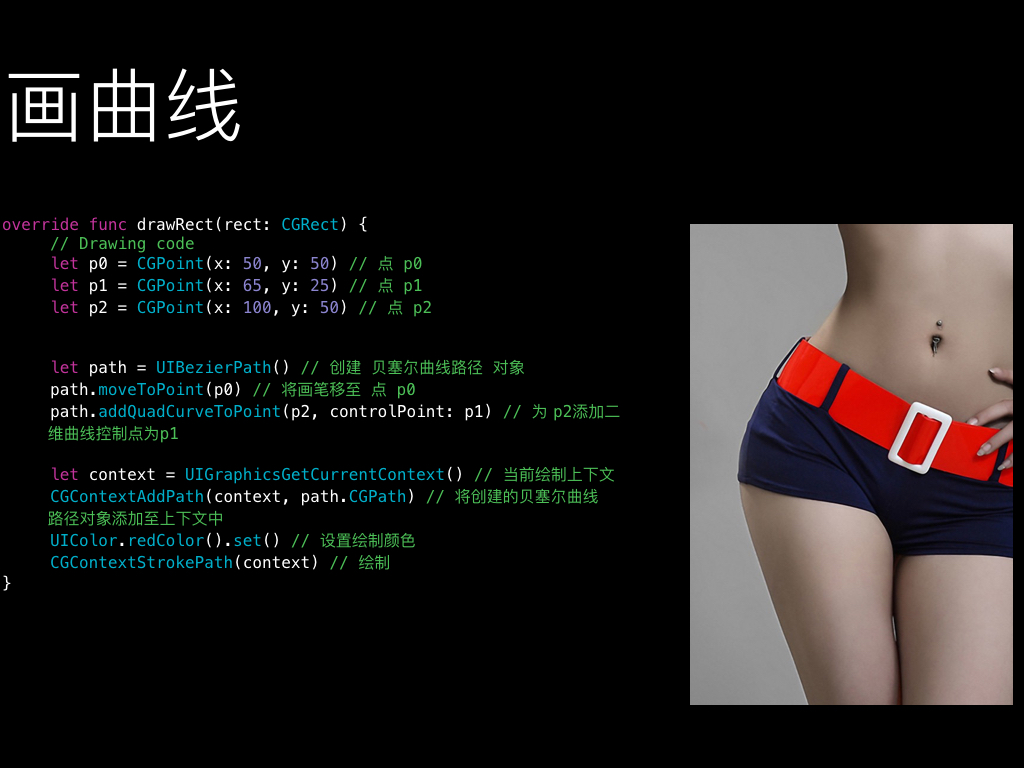
如何画曲线
效果展示:
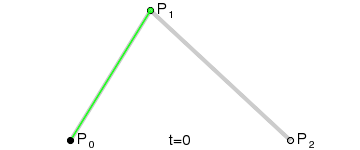
p0, p2 是普通点,p1 是控制点。
代码实现:
|
|
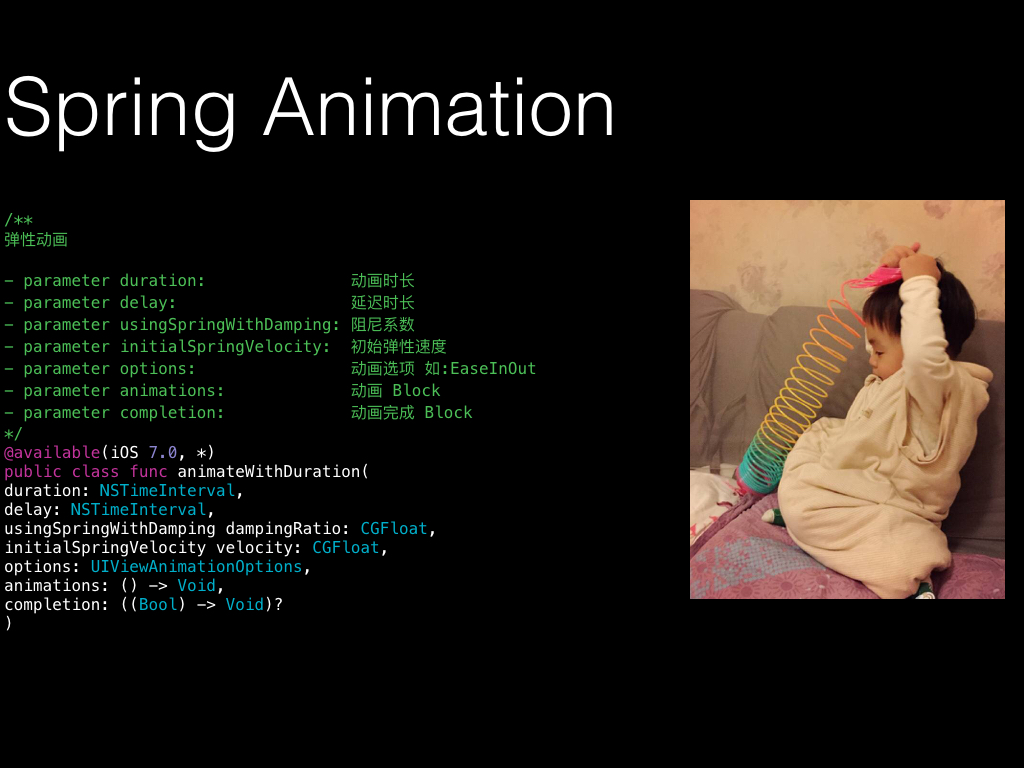
如何使用弹性动画
|
|
上面的注释已经写得很清楚,需要注意的是 usingSpringWithDamping 参数,即阻尼系数,数值范围 0 <= n <= 1,系数越大弹性越大。
更多详细介绍,请参考:
https://www.renfei.org/blog/ios-8-spring-animation.html
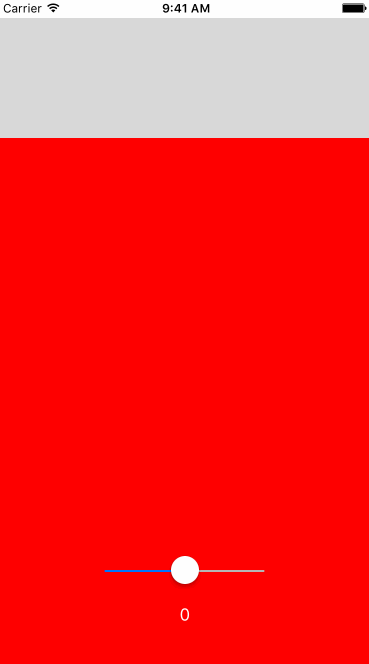
粘性动画原理
效果展示:
代码实现:
|
|
源码分析
详见分享链接里的源码注释。
源码中的几个问题
内存引用问题
源码 TabbarMenu.swift 中有这么一段代码:
|
|
这里面存在着一个保留环的问题:
- TabbarMenu 实例
self引用了animationButton。 animationButton的 blockdidTapped又引用了self.triggerAction()。
如何解决这个问题?在 Objective-C 中我们使用 __weak,在 Swift 中呢?我们需要添加 [unowned self]。实现如下:
|
|
关于 Swift 保留环,如何处理的问题,请参考:
私有方法问题
源码 AnimatedButton.swift 中有这么一段代码:
|
|
@objc 是什么鬼?
如果去掉 @objc,在 Xcode 7.3 中会直接报错(Xcode 老版本 运行点击按钮会出现崩溃):

经查证,原因如下:
Declarations marked private are not exposed to the Objective-C runtime if not otherwise annotated. IB outlets, IB actions, and Core Data managed properties remain exposed to Objective-C whatever their access level. If you need a private method or property to be callable from Objective-C (such as for an older API that uses a selector-based callback), add the @objc attribute to the declaration explicitly.
大意为:
在 Swift 中,如果将方法或者属性标记为 private,将不会给 Objective-C Runtime 暴漏,如果想从 Objective-C(一些老的 API,像基于选择器的回调),必须明确添加 @objc 标识。
修改高斯模糊视图 alpha 问题
在运行源码的过程中,我们看到控制台打印出如下警告:
2016-03-27 10:29:28.879 GooeyTabbar[54798:1868007]
is being asked to animate its opacity. This will cause the effect to appear broken until opacity returns to 1.
不应该修改 UIVisualEffectView 的 opacity 的属性。应做如下修改:
|
|
请参考:
分享的心得体会
0.如果一件事情你从来没做过,身边又没有合适的老师,怎么办 ?
从网上找相关专业最好的东西来模仿。
我找的是苹果 WWDC Keynote 视频:
1.如何进行设计
现在才发现设计是如此重要,做程序猿也要文艺点。由于原先就意识到这个问题,读过《写给 大家看的设计书》这本书,如何对齐、如何重复、如何配色等等。这些对我启发很大。每个像素都值得深究。
2.如何配图
Keynote 中最重要的一点,就是好的配图。配图能激发听者的兴趣。因为原先写博客的原因,积累了一些有意思的配图。平常发现有意思的图,就应该收藏下来,说不定哪天就能派上用场。
3.一些新的发现
通过学习 Keynote,我找到了一些好的资料,比如许岑老师的教程以及如何使用 Keynote 做动效等。把每件小事做好,都是一件不简单的事情。
4.不足
口才。终于明白,提前排练的重要性(连乔布斯也要在演讲前都要反复排练)。自己没有排练过,导致语次颠倒,逻辑稍有混乱。
图片版